How to make a Video with Photos and Music! [The Ultimate Guide]
Shail - August 12, 2020 - Leave your thoughts.
Pictures are captured memories. They’re snapshots of the best moments in your life. Just one picture can tell a million stories.
So imagine the power of an array of pictures in a video! It can bring out a rainbow of emotions which no words ever can.
This is why picture videos are both personal and exceptional. Be it a simple Christmas greeting to your teacher or even a romantic video slideshow to your girlfriend; Photo videos have everything needed to hit the right chord in one’s heart!
Now, creating such videos has always been a taxing affair. It either takes a lot of work or costs a lot of money!
In the next few minutes, though, you will become a master in this art! For we have the perfect picture video maker - Animaker.
Let’s Get Started!
If you’re a first time user, Sign up for a free account.
Log in if you already have an account.
Now, there are two roads, either of which you can take:
Whichever path you choose, we’ll tag along and help find the destination!
Either way, you get plenty of flexible options and powerful features to exercise and create a staggering picture video by yourself. Check out this video to know how to make a video with photos and music.
How to edit a Photo Video Template:
Editing a template is surprisingly simple. You can complete your final video within 5 minutes by just following these simple steps:
1. Login to Animaker, and you’ll find yourself on the Dashboard. Look for “Photo video” in the search bar.
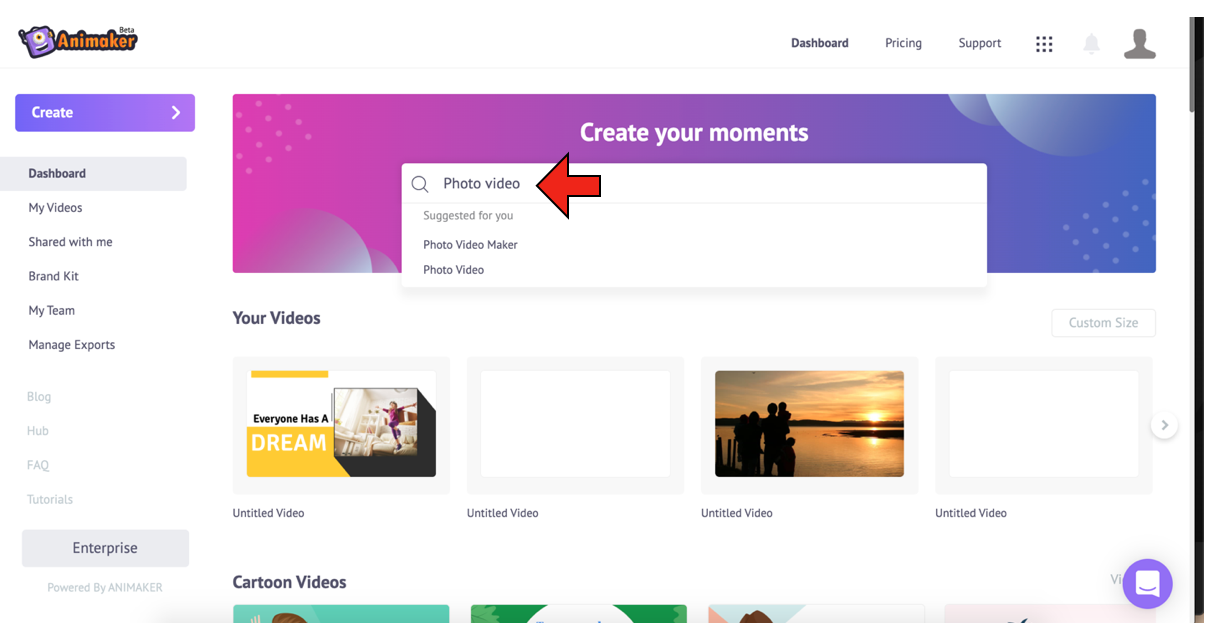
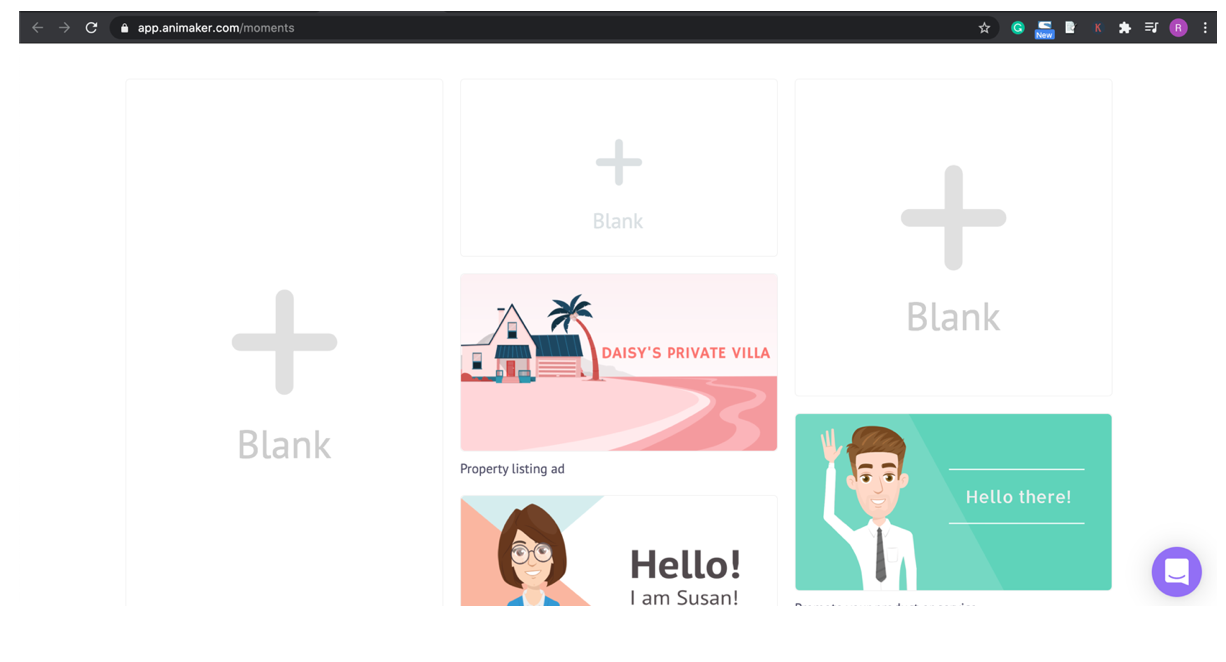
2. This will redirect you to the Moments page, where a massive list of photo video templates will be displayed. You can hover over any template and click on ‘Preview’ to get an idea of the template. Once you decide which one to use, click on the ‘Use’ button.

3. The template you picked will now be launched as a new project.
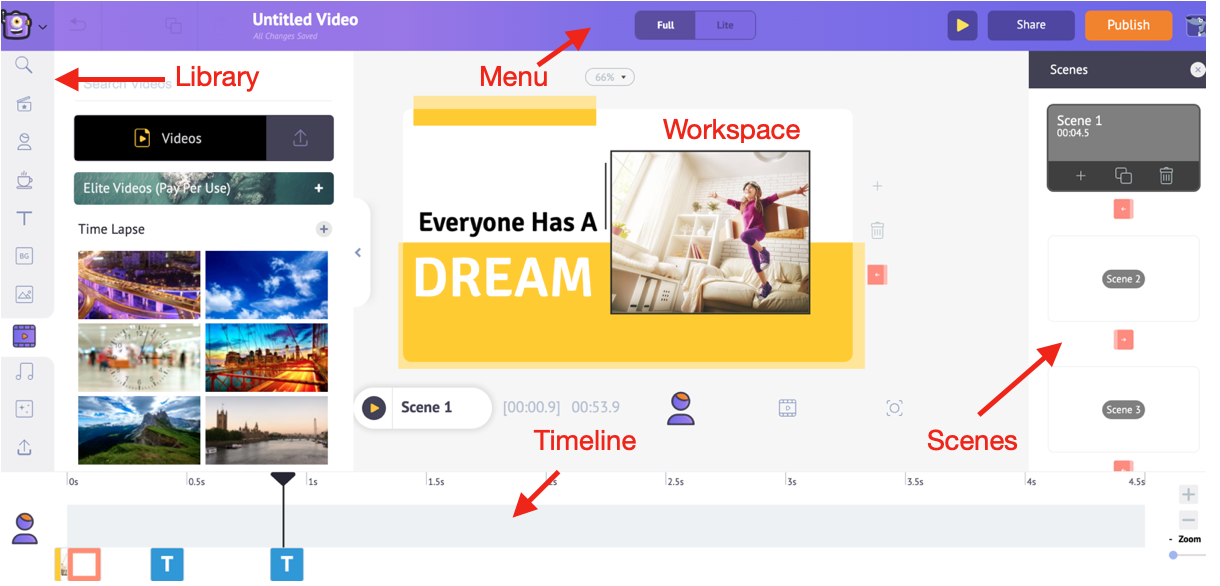
As you can see, there are five sections here:
- Workspace: It’s the space at the center, where you’ll create your video using pictures.
- Library: It’s the section you see to your left, where you’ll find all the texts, characters, props, music, and animation effects.
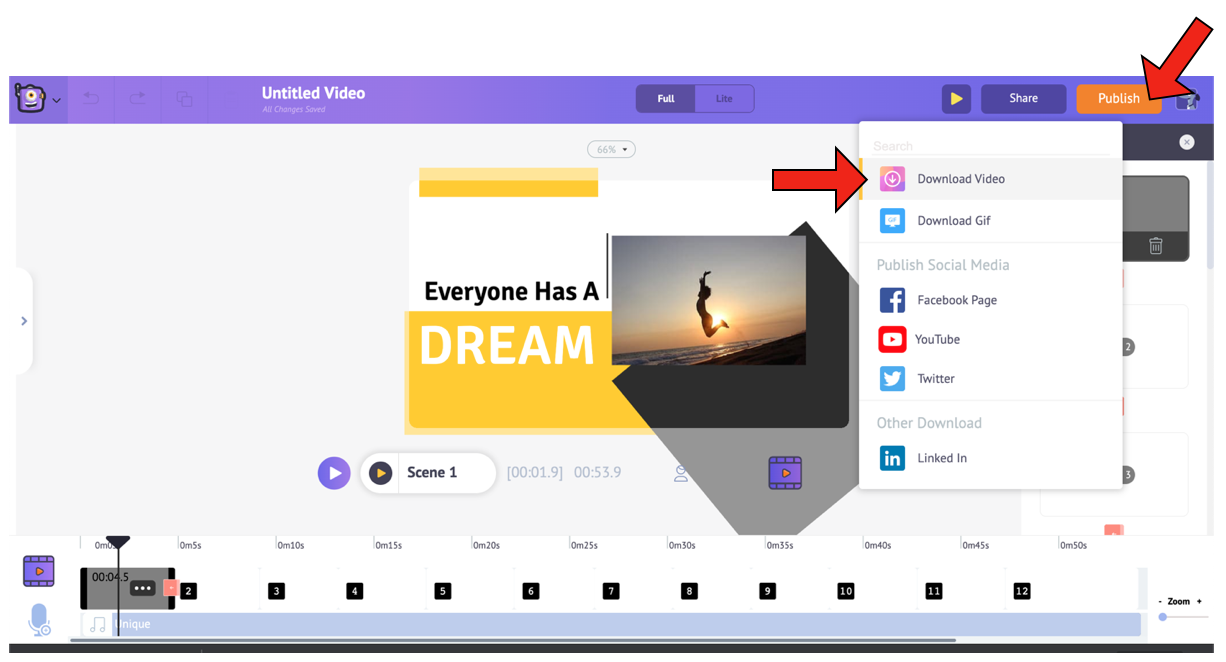
- Menu: It’s the section at the top, where you can use options for creating a new video, resizing the current video, copying the video, sharing the video, publishing the video, and more.
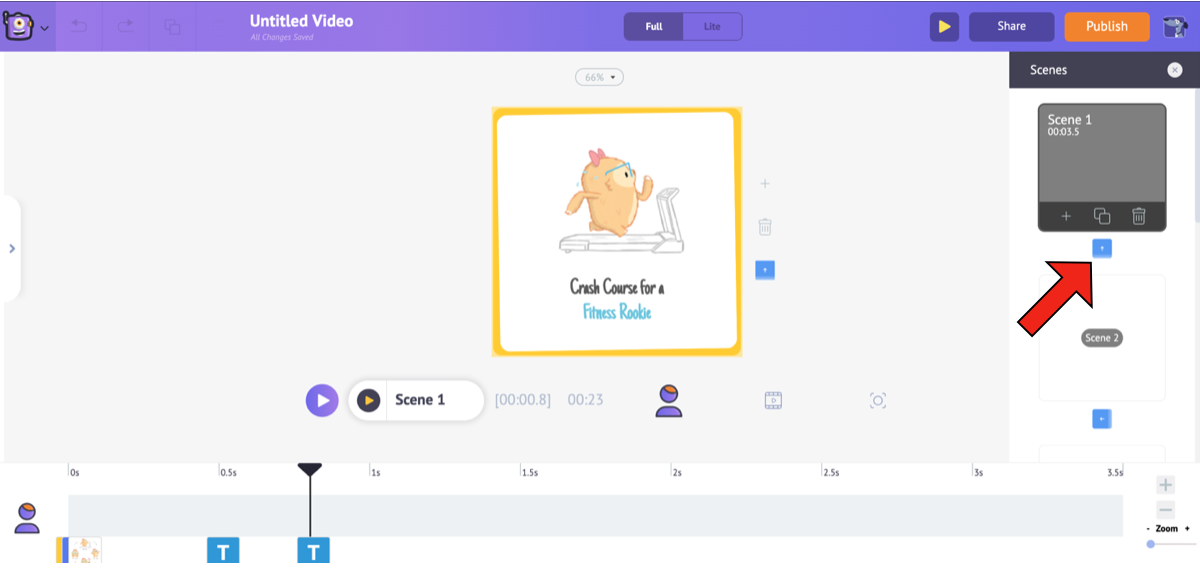
- Scenes: It’s the section you see to your right, where you can add multiple scenes to your video.
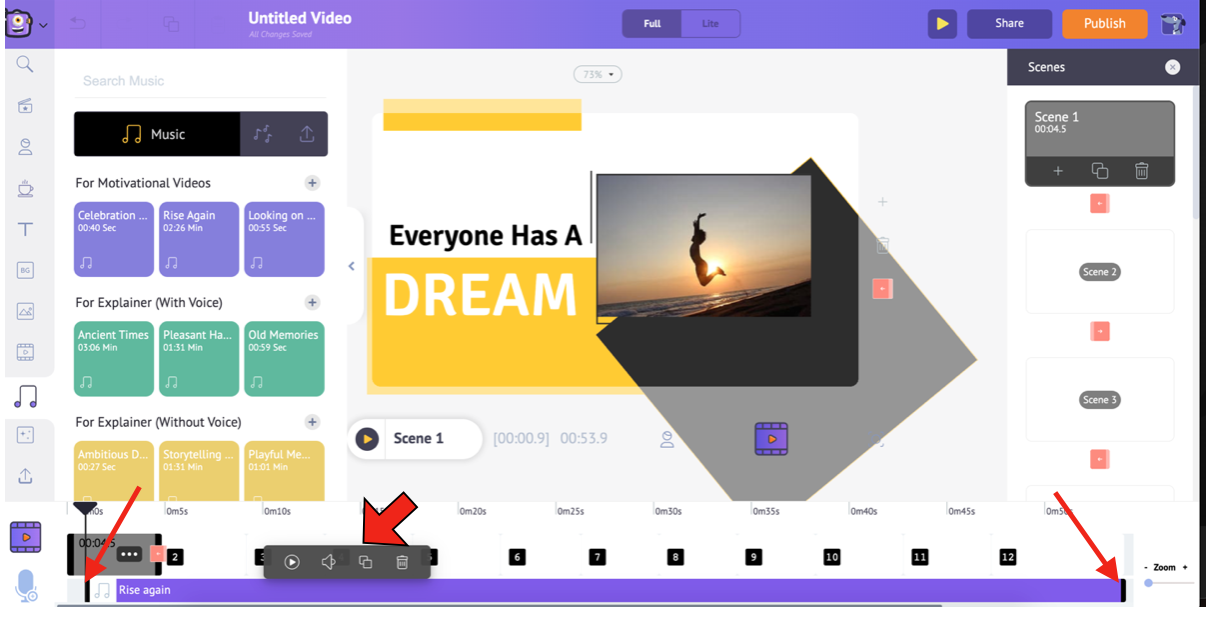
- Timeline: It’s the section you see at the bottom, where you adjust the timings of the elements and their effects. Whenever an element is added to the video, you will notice it being added to the timeline. The timeline is divided into three:
-
- Object timeline (Animation timeline) - to manage the characters and objects in the video.
- Video and audio timeline - to manage the audio and video you add to your project.
-
Camera timeline is, of course, for the camera. It is to control the timing of the camera effects that we use.
-
How to make a video with photos and music (Using Animaker):
Step 1: Upload and insert your pictures into the template.
Replace the pictures in the template by uploading your pictures. Once uploaded, you can make them fit the video by resizing them and adding animation effects.
Edit the style, color, and size of the font.
Change the background music by select any music track from the library. Alternatively, you can also upload and add your own music to a video.
Check out the preview and then download the video.
All set? Now, Let’s begin:
STEP 1: Insert your pictures into the template
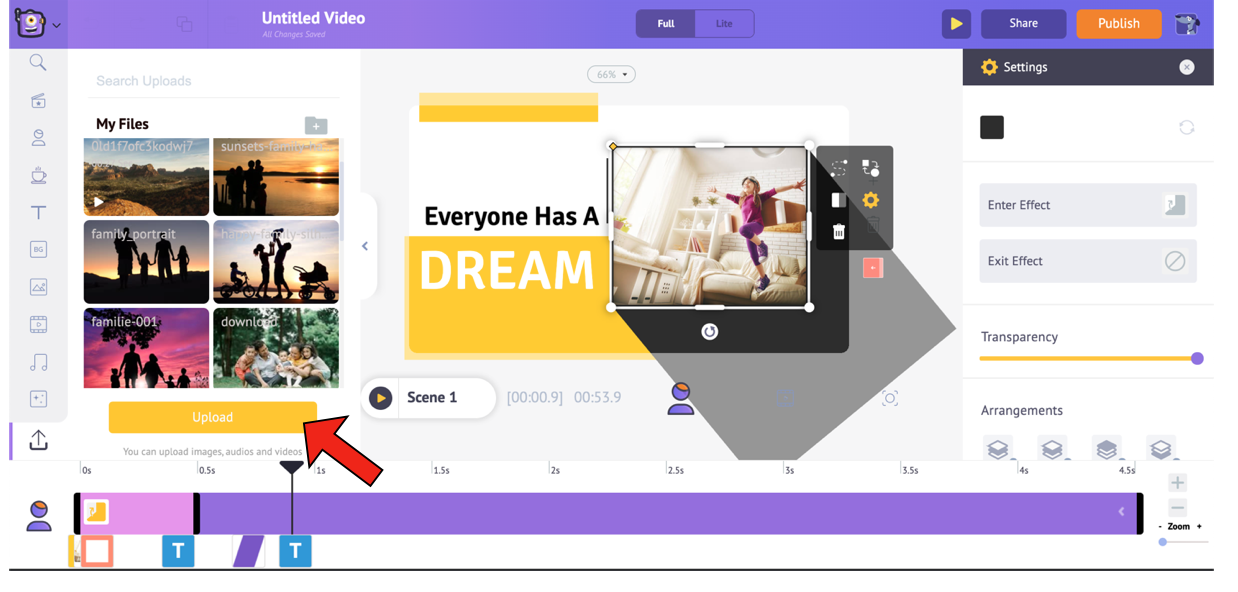
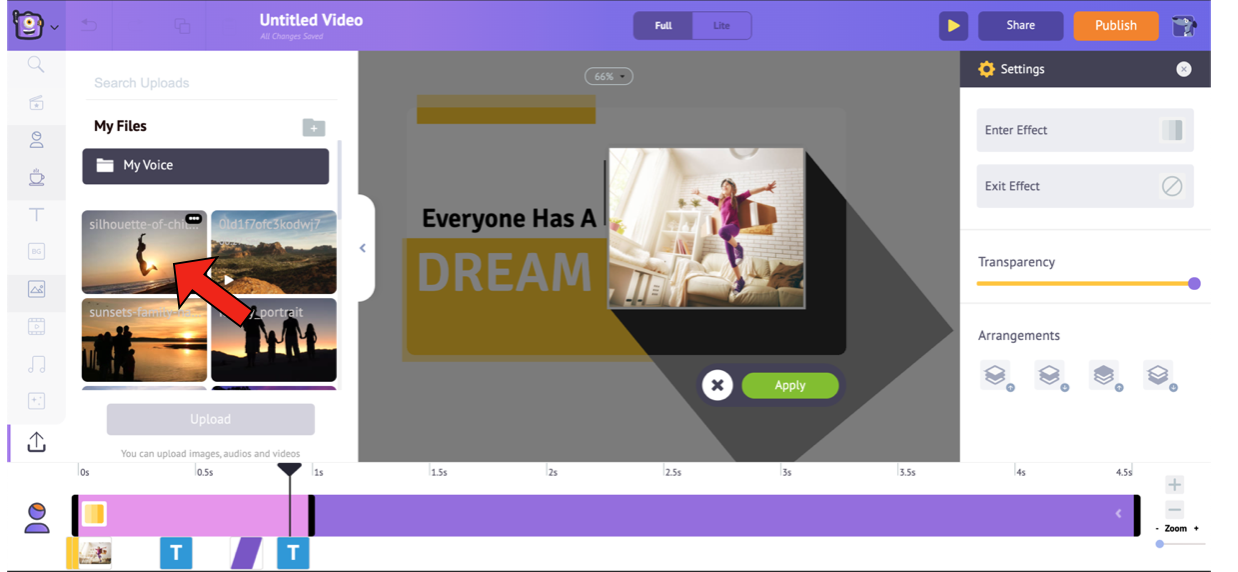
Decide on the list of pictures you want to feature in your video. Now upload them one by one using the My uploads section. Here’s how! Click on the Upload option in the library.
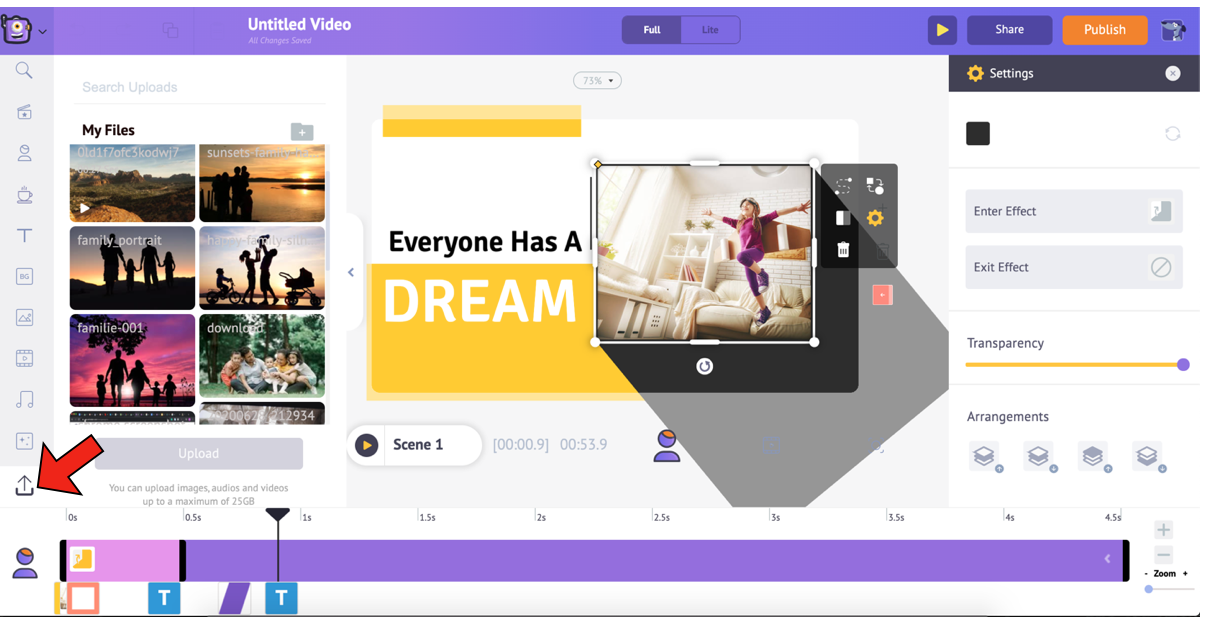
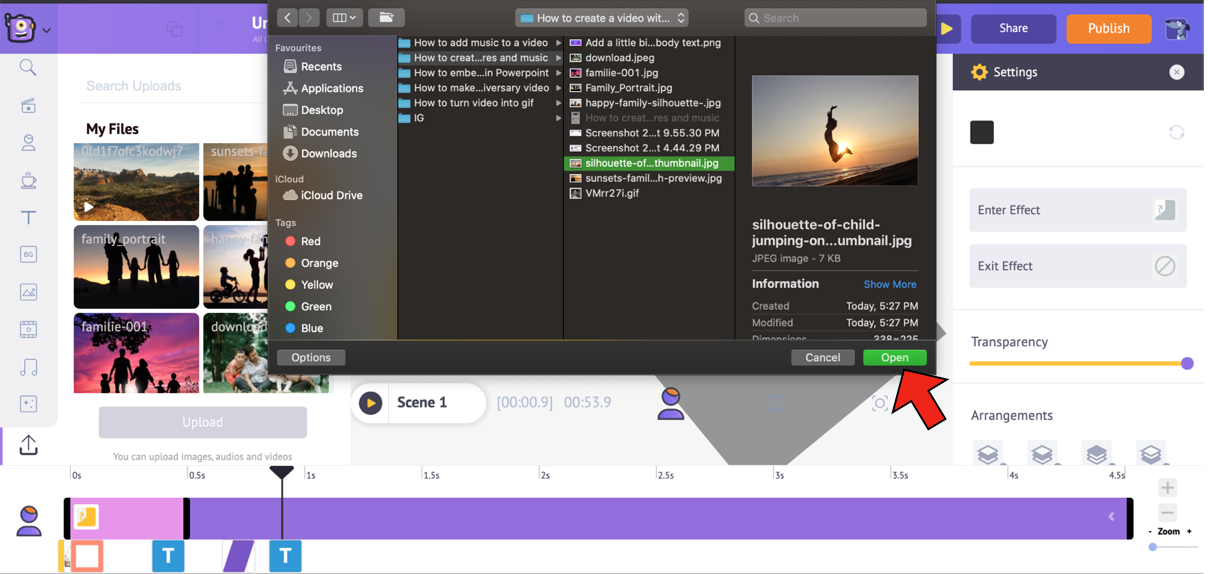
Click on the Upload button and select the file that you want to upload from your system. You can also drag and drop the file directly into the app.
Once the image is uploaded, click on the existing image in the workspace. This will open the Item menu. Click on the Swap icon from the Item menu.
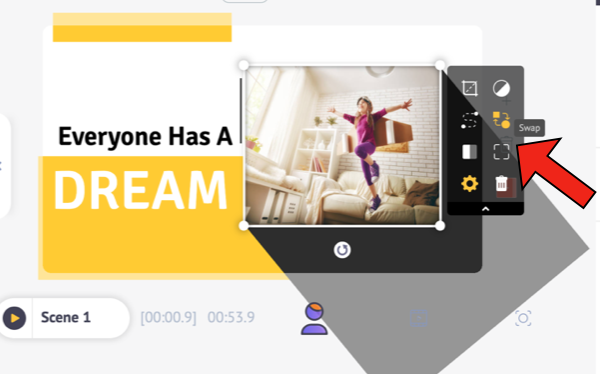
Choose the picture (you want to swap it with) from the upload section and click on Apply.
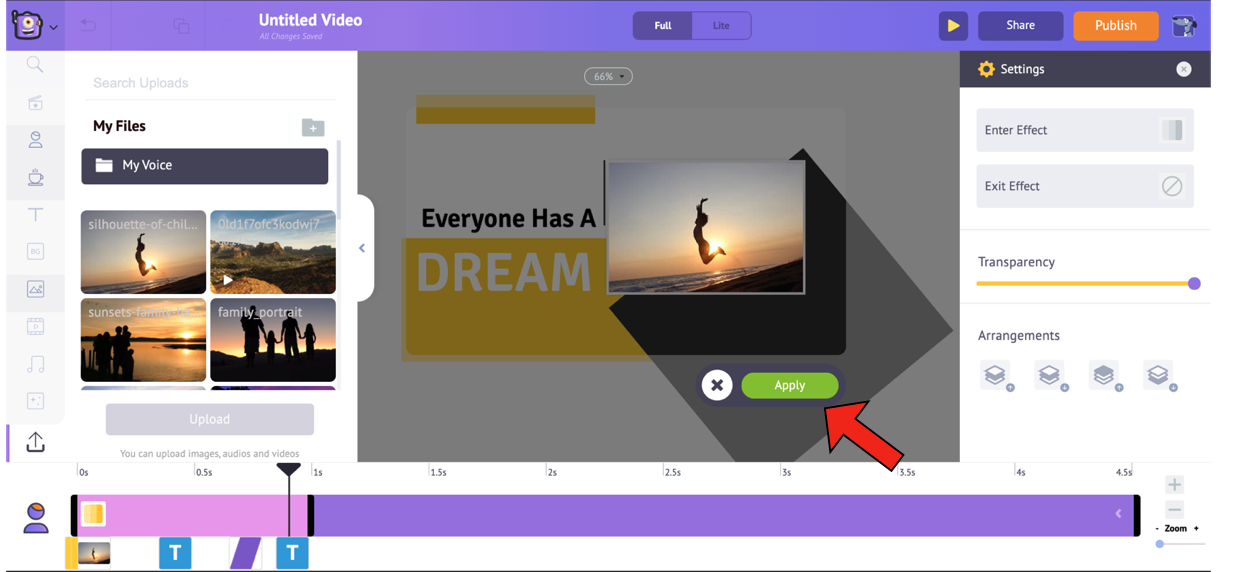
You might want to resize it a bit by merely clicking on the image and dragging it outwards or inwards by its edges!
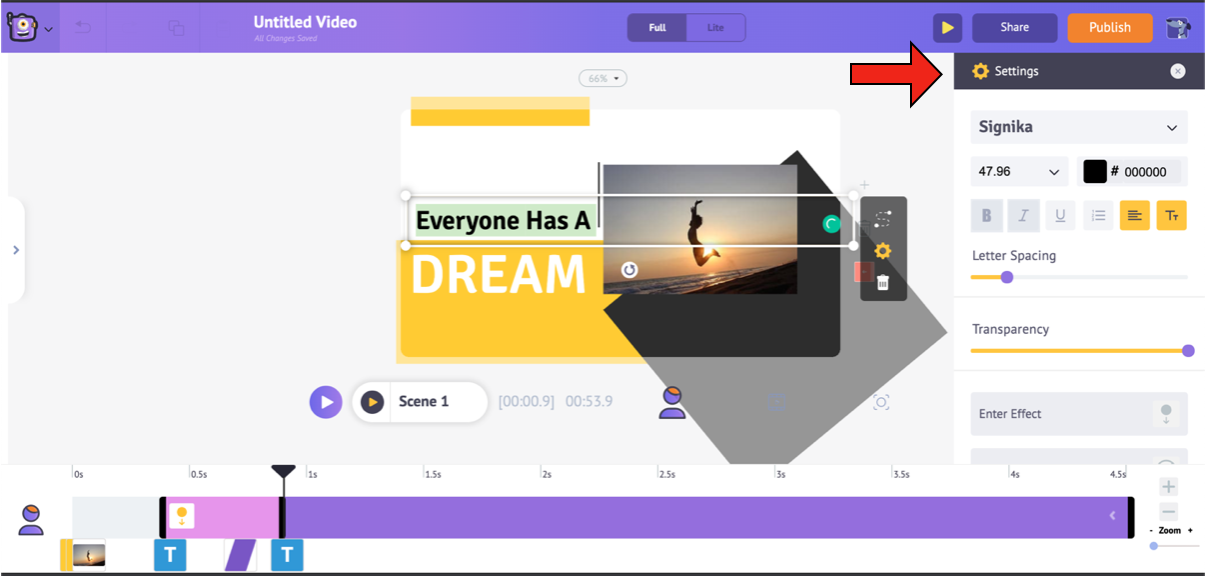
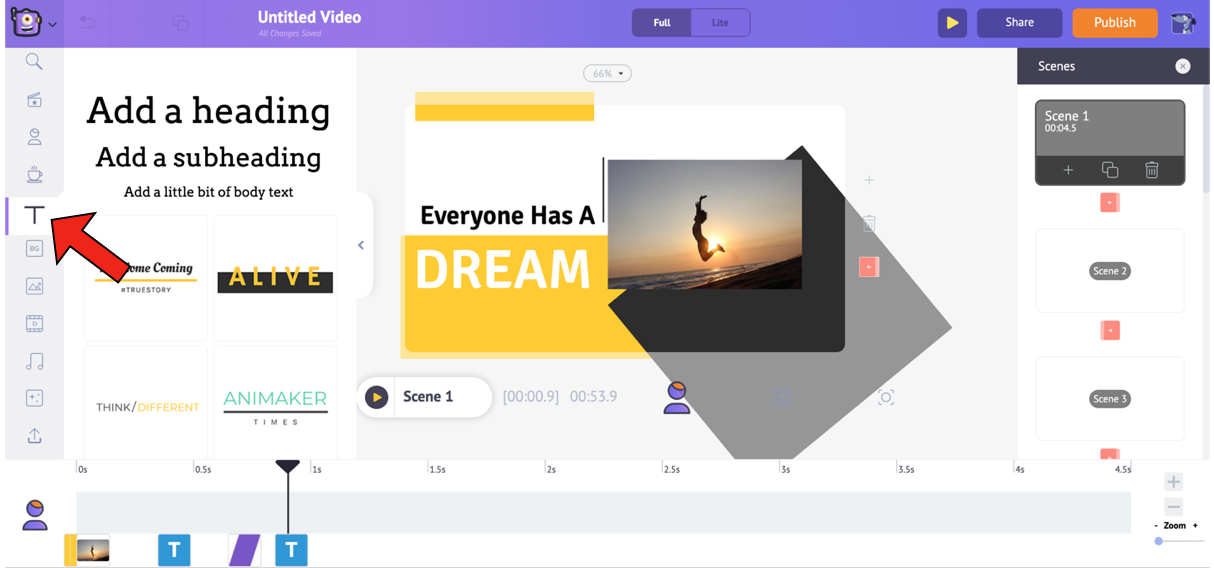
STEP 2: Edit the text on your video
To edit the text on a scene, click on the existing text. Clicking it will open the Text Settings window, where you can change the font style, size, color, alignment, and give entry/exit effects for the text.
Now, edit the content inside the textbox to the way you wanted.
You can also add new text by clicking on the Text icon in the Library. You can select any style from the list of Text pre-builts in the Library. These text pre-builts are formatted with unique entry and exit effects to make life easier for you. Apart from these pre-builts, you can also select a heading, subheading, or body text, format it, and provide it with entry/exit effects.
STEP 3: Play with the music
The pre-built template that we had selected comes with background music. If you want to change the background music, Animaker’s rich library gives you a whole host of options.
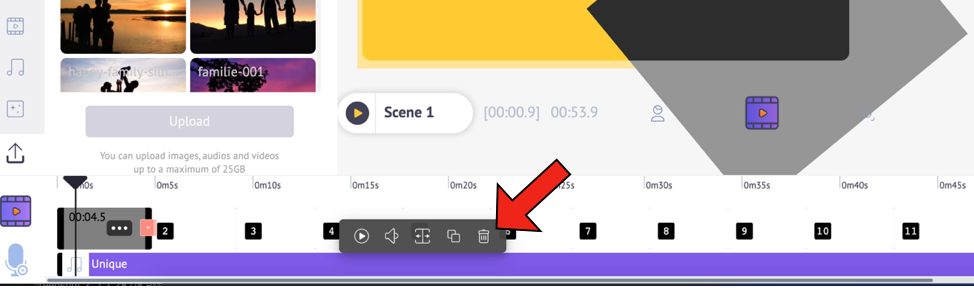
To change the existing BGM in this template, you can remove it from the timeline below. When you select the audio, you will notice a pop-up with some options appear. Remove the track by selecting the Delete option.
To choose a new music track/sound effect, select the Music option in the library. This will list several royalty-free music tracks. Similarly, to add sound effects, select the option next to Music.

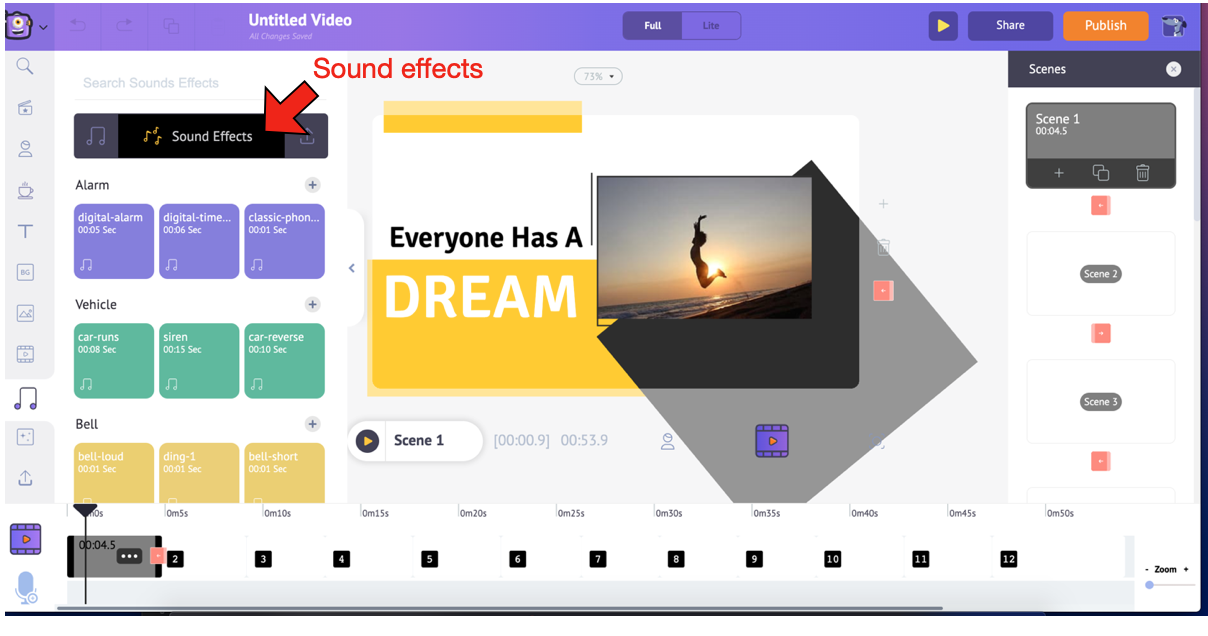
Hover over any track/effect to preview it. Add a track to the video by simply clicking on it. You will notice the track getting added to the timeline below.
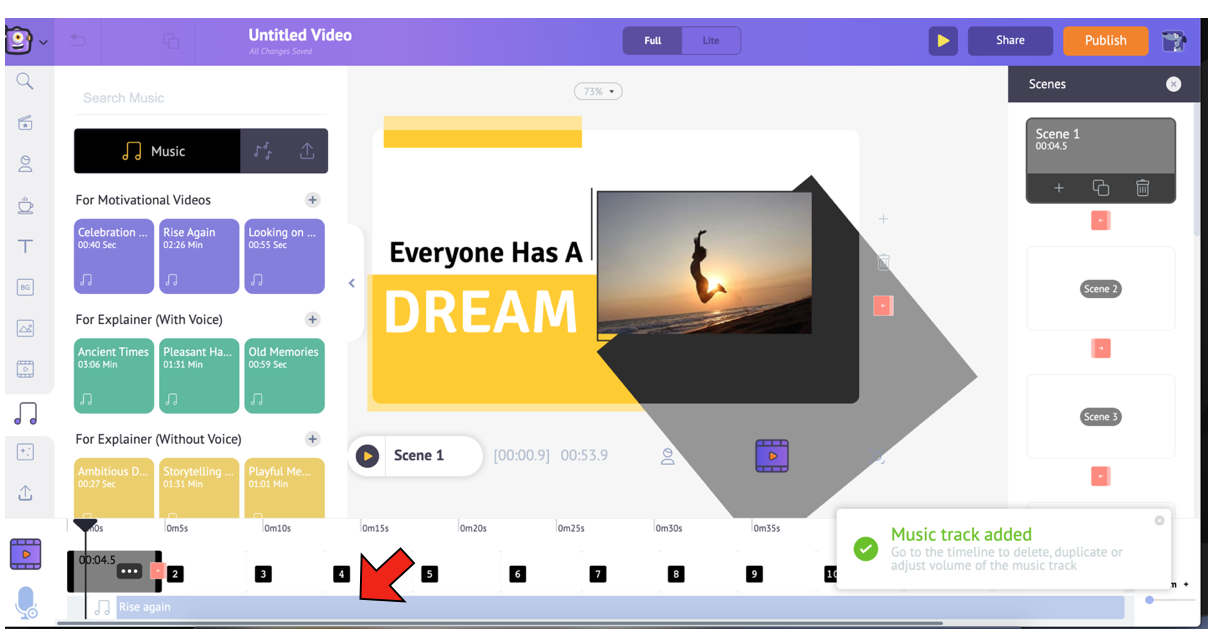
From the timeline, you can preview the track, adjust its volume, duplicate it, and delete it. You can also extend the black marks at the ends of the track to extend or contract it.
And if that’s still not enough, you can upload your music the same way you uploaded your pictures and add it to the video.
STEP 4: Export your video (your masterpiece!)
But first, I advise you to see a preview of what you’ve made. Click on the video preview button to preview your entire project. You can use the scene preview button if you just want to preview the scene that you are on.

Looks perfect? Now, export it with the click of a button:
How to create a video - from scratch:
If a template video took you 5 mins, making a video from scratch would probably demand 15 but not more!
For making a completely new video, you need to know just a little more than what you already do by now.
Ready?!
Choose a blank project (vertical, square, or horizontal) from the Moments page.
Once inside the app, you can use the richest animation library there is, and get cracking!
There are a plethora of characters, properties, backgrounds, music, and whatnot at your service! And not to forget, you can upload any picture and/or music on the app and use that too.
In addition to all that, the variety of animation effects here will make you go bonkers!
Let’s have a look:
1. Object effects: With these effects, you can decide how your scene's objects enter and exit!
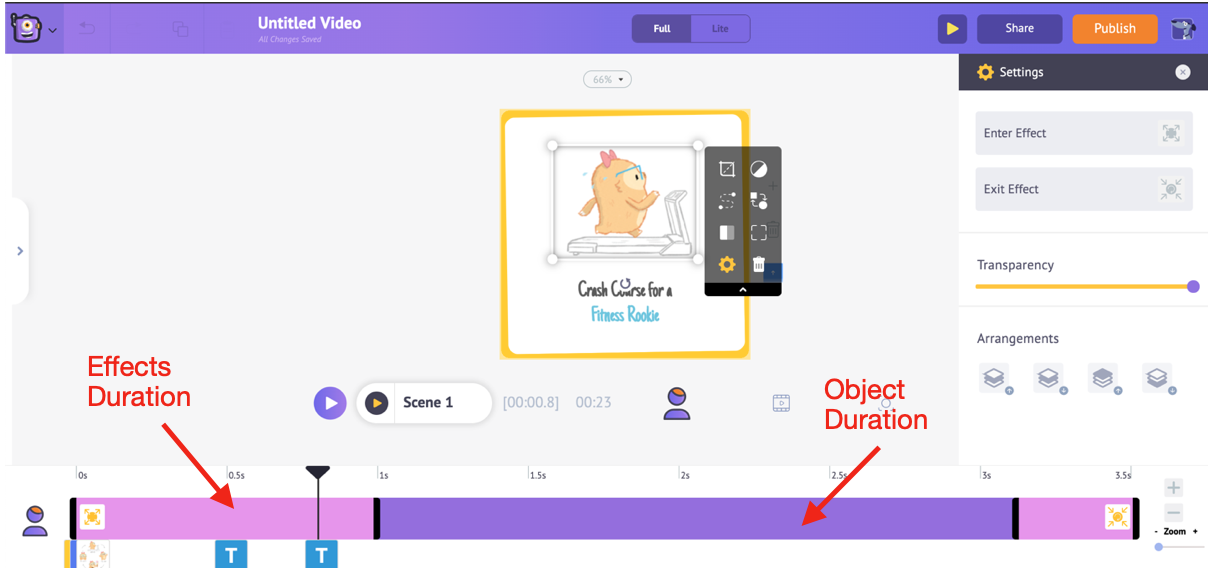
And always know that you can control the timings of your objects and effects in the scene through the timeline. The pink portions depict the duration of the effects, while the purple part depicts how long the object stays in the scene. You can adjust the timings by dragging the black bars at the ends of these portions.
2. Motion effects: As the name suggests, these effects help you move objects and characters within a scene. There are two motion effects for you:
- Smart Move: Helps you add complex animations to your object. Check out this video to know more.
- Action +: Helps you link a bunch of actions performed by a character and animate the character perfectly. Check out this video to know more.
3. Special Effects: The Special Effects option in the Library has a host of effects that will add premium animation to your video! You can customize their color too.
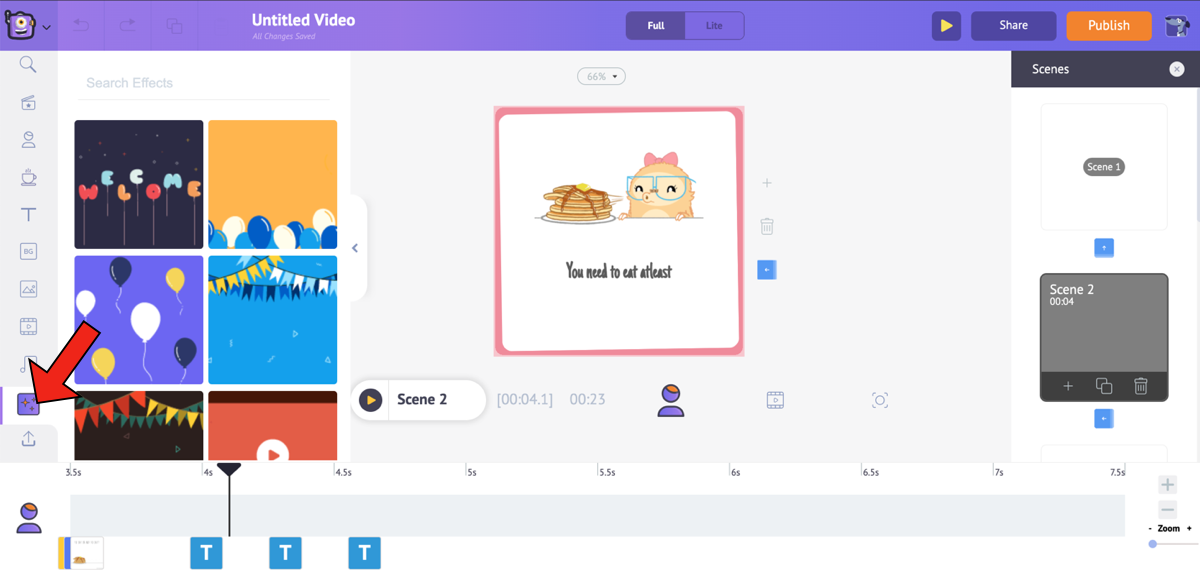
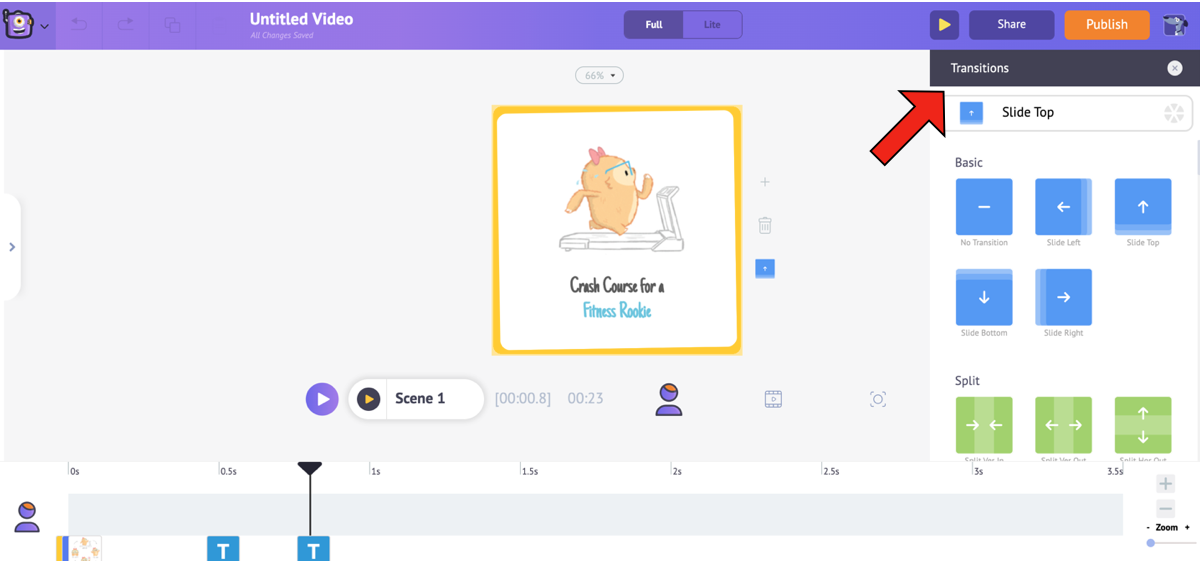
4. Transition effects: These are the effects that give a smooth transition from one scene to the next. To apply these effects, press the option between two scenes in the Scenes tab. You can select any effect from the big list that appears!
These features and effects are just the “tip of the iceberg.” Season them with your creative awesomeness to cook up something exceptional.
Go ahead and give your imagination, Wings!
Should you have any questions/doubts, shoot ‘em in the comments section. We will be happy to help you out!