How to make a smashing YouTube thumbnail in 5 mins!
Saurav - September 14, 2018 - Leave your thoughts.
Have you ever been to a bookstore?
What is the first thing that makes you pick up a book?
If you guessed the Book cover! You are absolutely right!
A YouTube thumbnail is just like a book cover for your video. It is the first thing that people notice before deciding whether they will click on your video or just scroll over without noticing it.
Infact, YouTube reports that “90% of the best performing videos on YouTube have custom thumbnails.”
So, if you have still not started using custom thumbnails on your video, you are missing out on a great opportunity to get traffic to your YouTube video.
In this article, we will cover everything you should know to get started with custom thumbnails. We will start with the ingredients that make a perfect thumbnail and then walk you through the entire process until you make the thumbnail live on your video. If you want to directly jump to the creation part, you can click on point 2.
- 1. What makes a YouTube thumbnail clickable?
- 2. How to create a YouTube thumbnail?
- 3. How to enable the custom thumbnail option?
- 4. How to add the created thumbnail to your youtube video?
1. What makes a YouTube thumbnail clickable?
Let’s first have a look at the elements that are part of every clickable YouTube thumbnail!
Our everyday conversations with 1000s of YouTubers helped us handpick some of the key ingredients to make a YouTube thumbnail truly clickable.
1. An Expressive Headshot
Human eyes are simply more attracted towards faces that one sees on a computer screen. This is especially true when the faces have some expression on them. These types of thumbnails make people curious about the reason behind the expression and hence end up enticing the viewer to click on the video.


This is why a lot of the YouTubers, have a close up shot of their face on the thumbnail.
2. Big-Bold text
When it comes to YouTube thumbnails they are displayed in a relatively smaller size. To make the font visible even at smaller sizes, a lot of the YouTubers use big-bold fonts on their thumbnails.


3. Adding sticker effect to the main subject
Adding a thick sticker like border makes the main subject stand out.
The same logic applies to YouTube thumbnails as well. YouTubers constantly use sticker effect to make their subject pop up.


4. Contrasting colored overlays for highlighting text
The main reason for using contrasting overlays on the thumbnail is to make the text stand out.
If we look at the images below, you can see that the text on the right image looks more readable because of the use of contrasting colors.
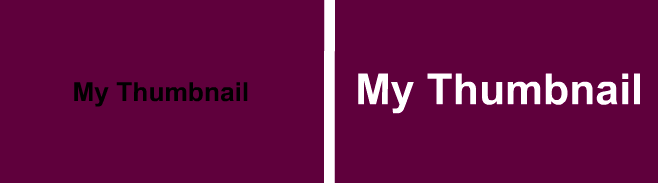
This is an awesome hack used by a lot of YouTubers while creating their clickable thumbnails
Here are a couple of images from two awesome YouTubers.


Following the pointers mentioned above will make sure that you have a truly clickable YouTube thumbnail.
2. How to create a Custom Youtube Thumbnail?
Now, let’s dive deep into the process of creating a YouTube thumbnail that stands out. In this guide, we are using Picmaker to make the custom thumbnails. Picmaker is Free, easy to use YouTube thumbnail maker launched by the creators of Animaker.
1. Select the subject image for your thumbnail
The best practice for creating a thumbnail is using an image which is relevant to your video.
Let's say we have a video talking about the “10 most shocking events of 2018”. Following the best practices mentioned in the previous section, let's get a headshot of yours ready for the thumbnail.
A headshot of your face with an amusing expression will work really well. If you don’t have the equipment or the time to get that ready, you can take an equally good screenshot from the video and use it to make the thumbnail.

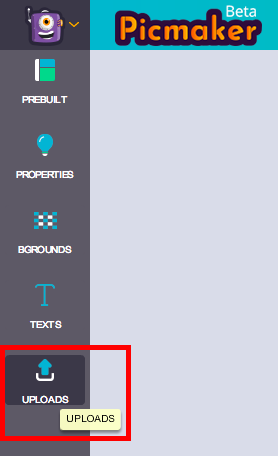
You can start by uploading the selected image into the Picmaker application using the upload section.
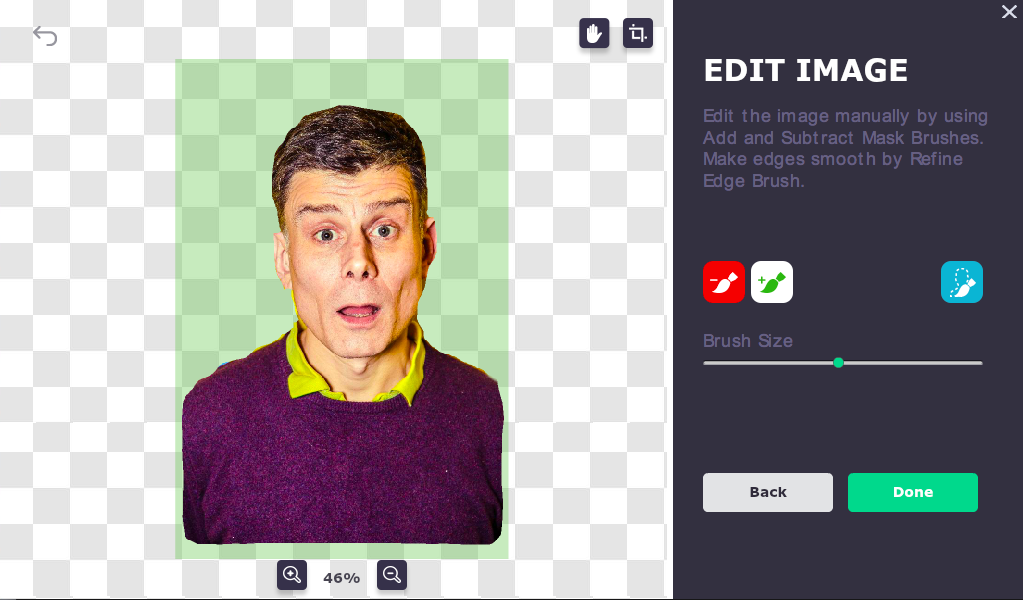
2. Remove the background of the image
To make sure that your subject is in focus, you have to remove the distracting background from the image.
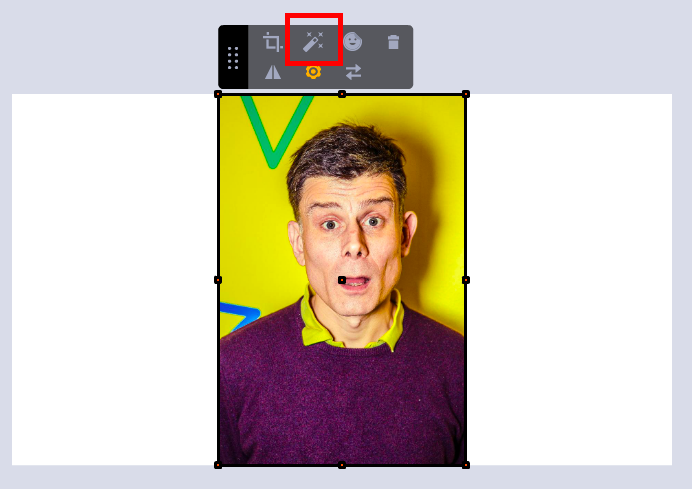
You can do this in under just a minute, by using the Automatic Background Removal tool that is available in Picmaker.
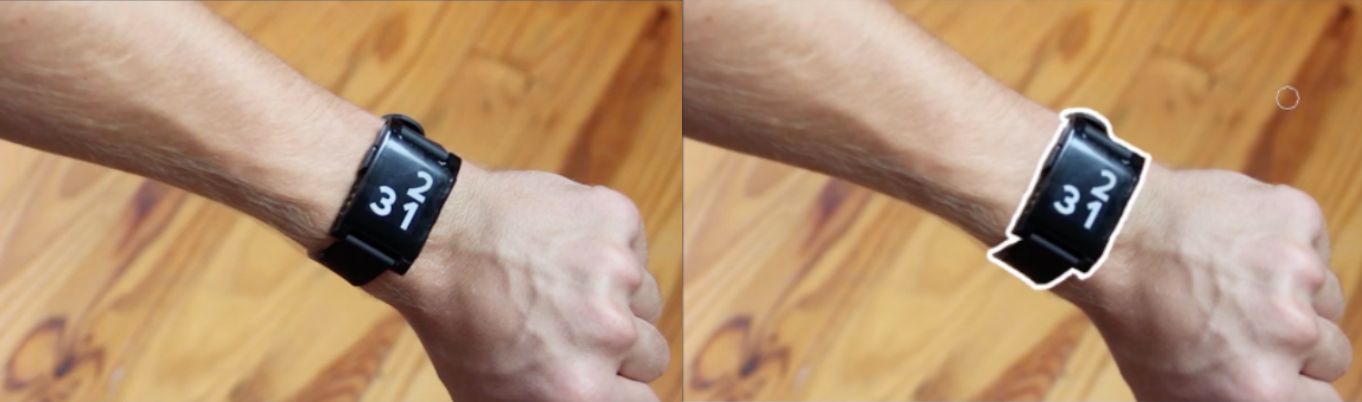
3. Add a sticker effect to your thumbnail
Adding a sticker effect helps your subject pop up and catch attention.
Look at these two images. In both the images the guy is showing the watch, but in the second image it pops up because of the thick border around the watch.
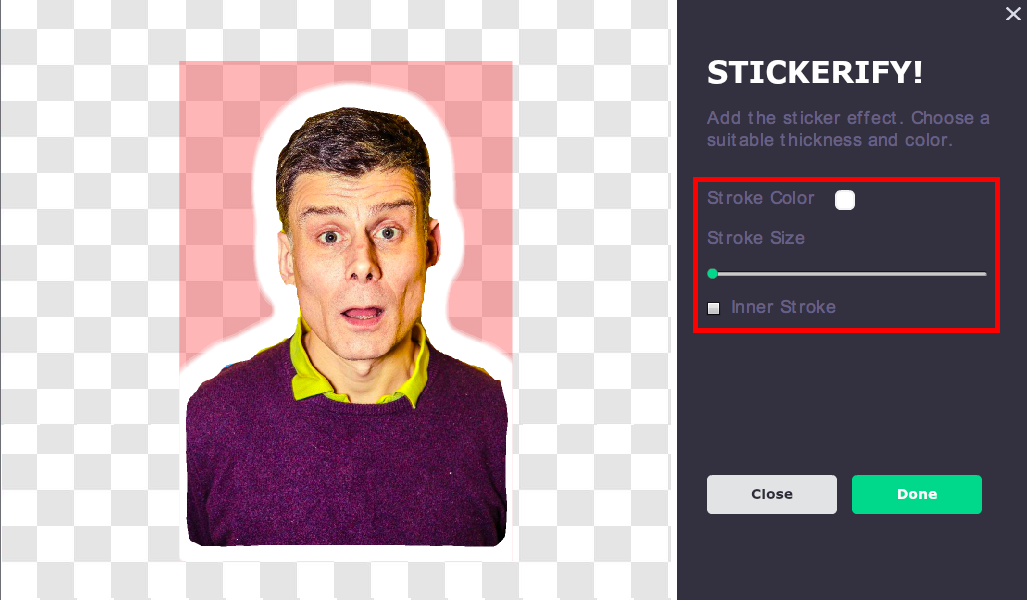
In Picmaker you can add a similar sticker effect to your image with just one click.
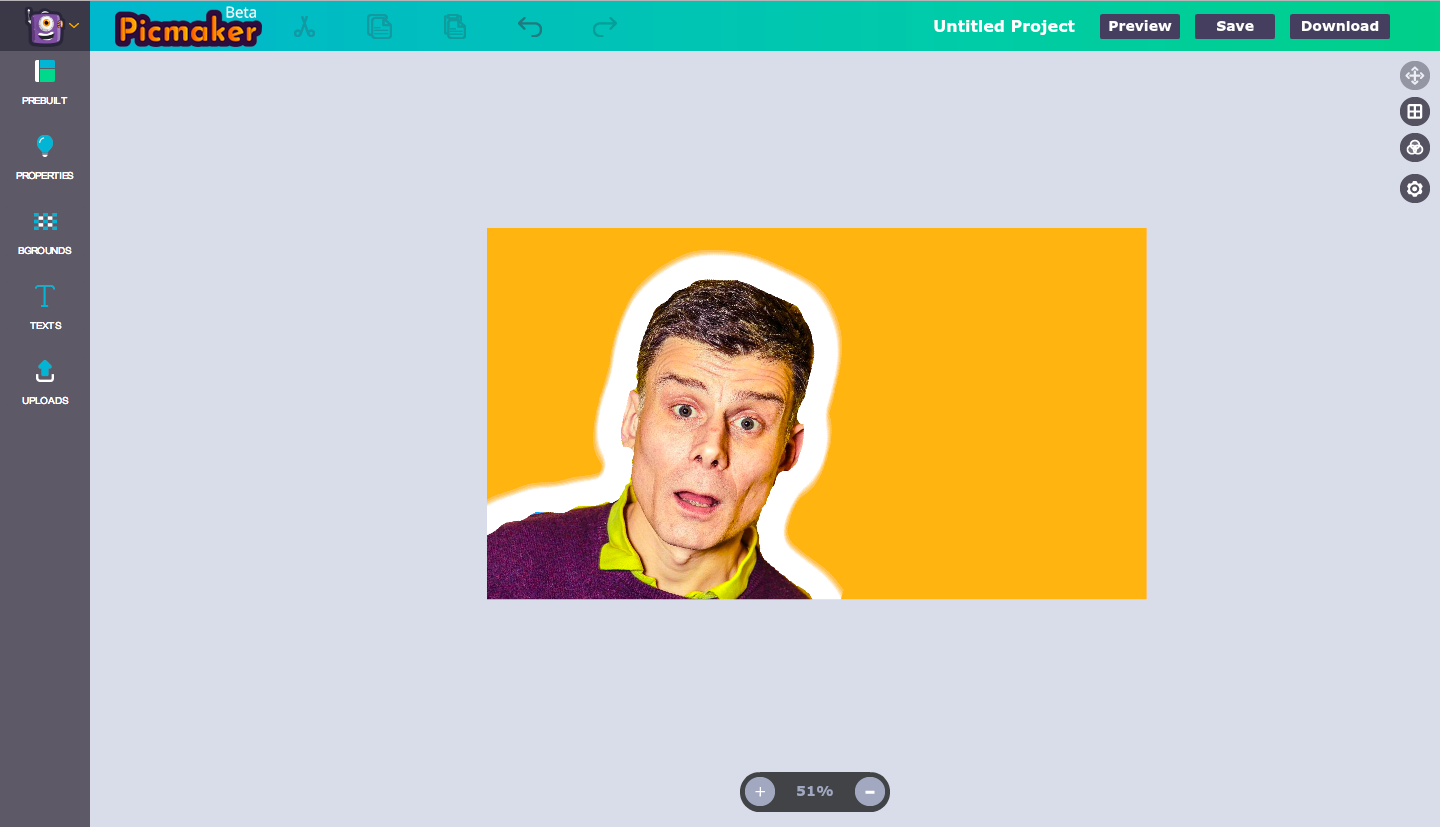
You just have to click on the sticker effect icon and a thick border will be added to your image in a snap.
You can also tweak the thickness and the color of the sticker effect by using the slider and color stroke option
Once the sticker effect is applied, you can even tilt the image a bit to make it look different from the ordinary.
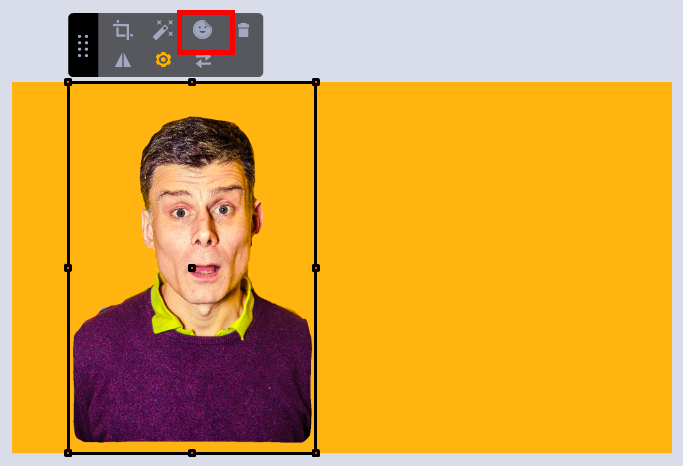
4. Spice up the background
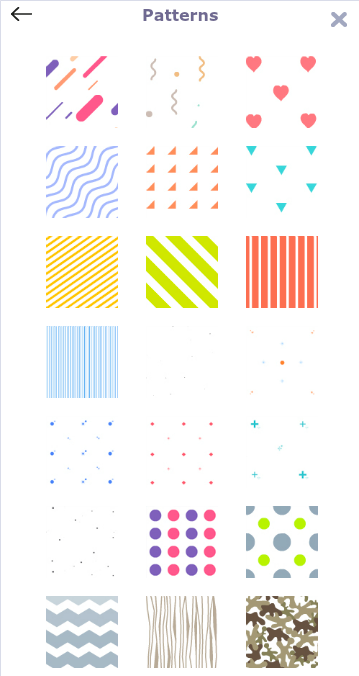
Now the next step is to spice up the thumbnail with an attractive background. You should select a contrasting color for the background so that it goes well with the subject and the text you are planning to have on the thumbnail. You can also spice up things quickly by adding a pattern to the background. Something like this

To add a pattern to your thumbnail, select the properties tab from the main menu and then click on patterns.
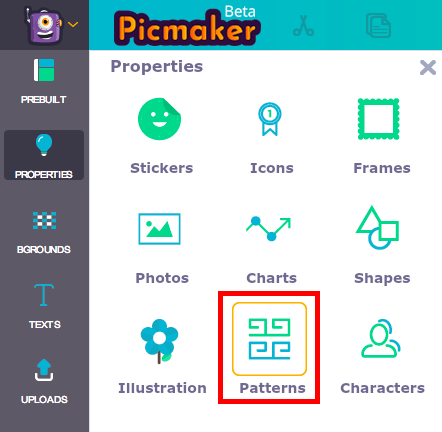
Just pick an option that suits your thumbnails’ composition and you are done!
5. Add some Big, Bold and Beautiful text to your thumbnail
When a video is displayed on the YouTube home page or the search results, the thumbnails of the video look a bit small! So, it is important to have text that is big, bold and beautiful. The text has to be big enough to make sure that the viewer can read the info on the thumbnail very clearly.
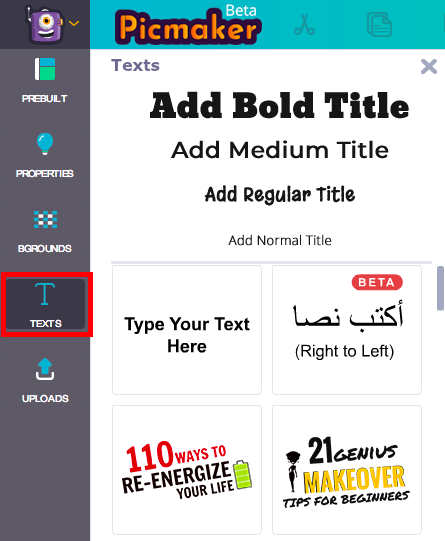
Now to add text to your thumbnail, click on the text button in the main menu. Now, you can either select a plain text box or you can select a prebuilt text template.
In the thumbnail below, we have used different fonts to stress on different words. If you notice we have made the word “Shocking” stand out more by adding a white color shadow to it.
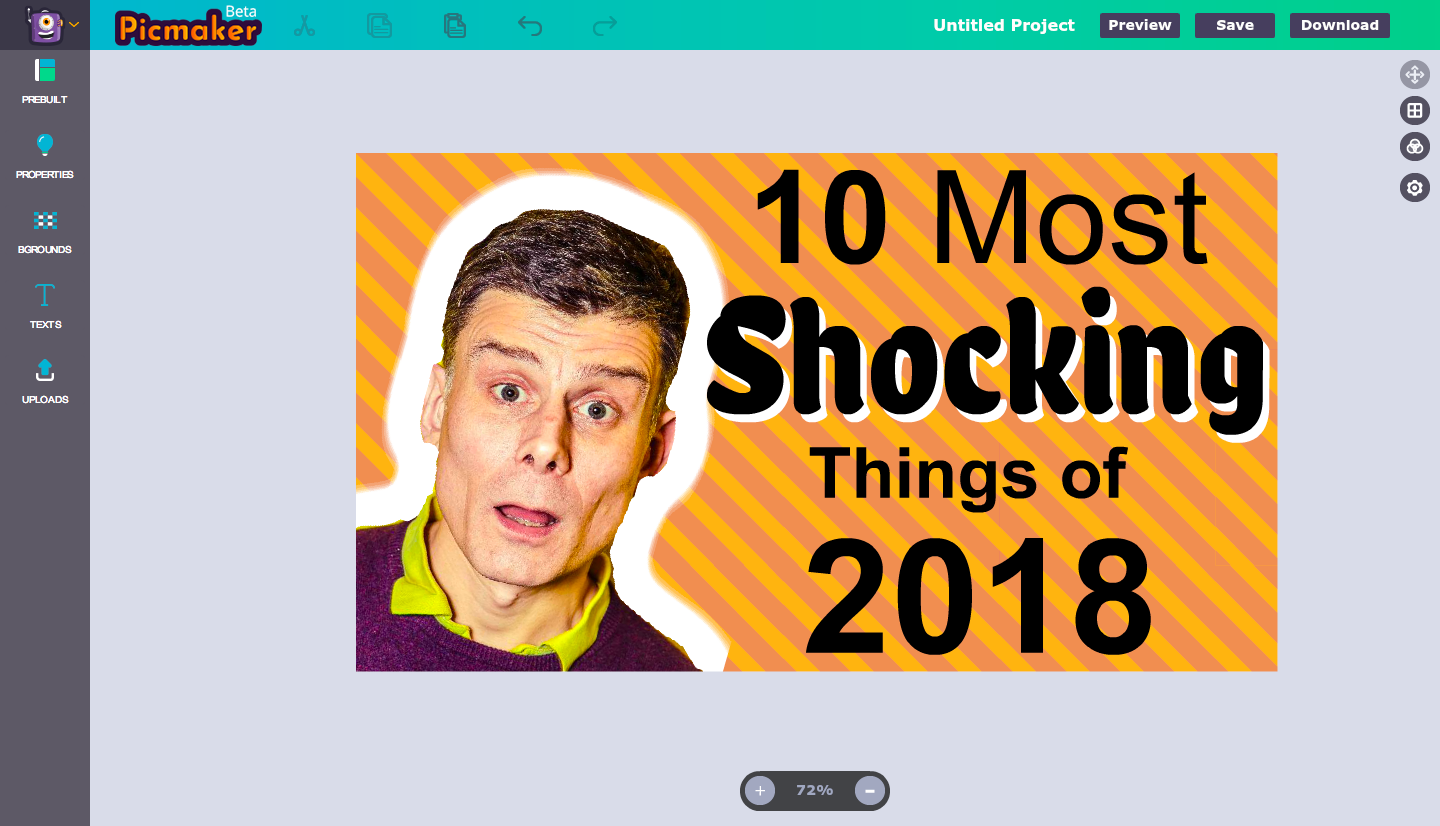
Looks cool! Doesn’t it?
6. Preview your thumbnail and download
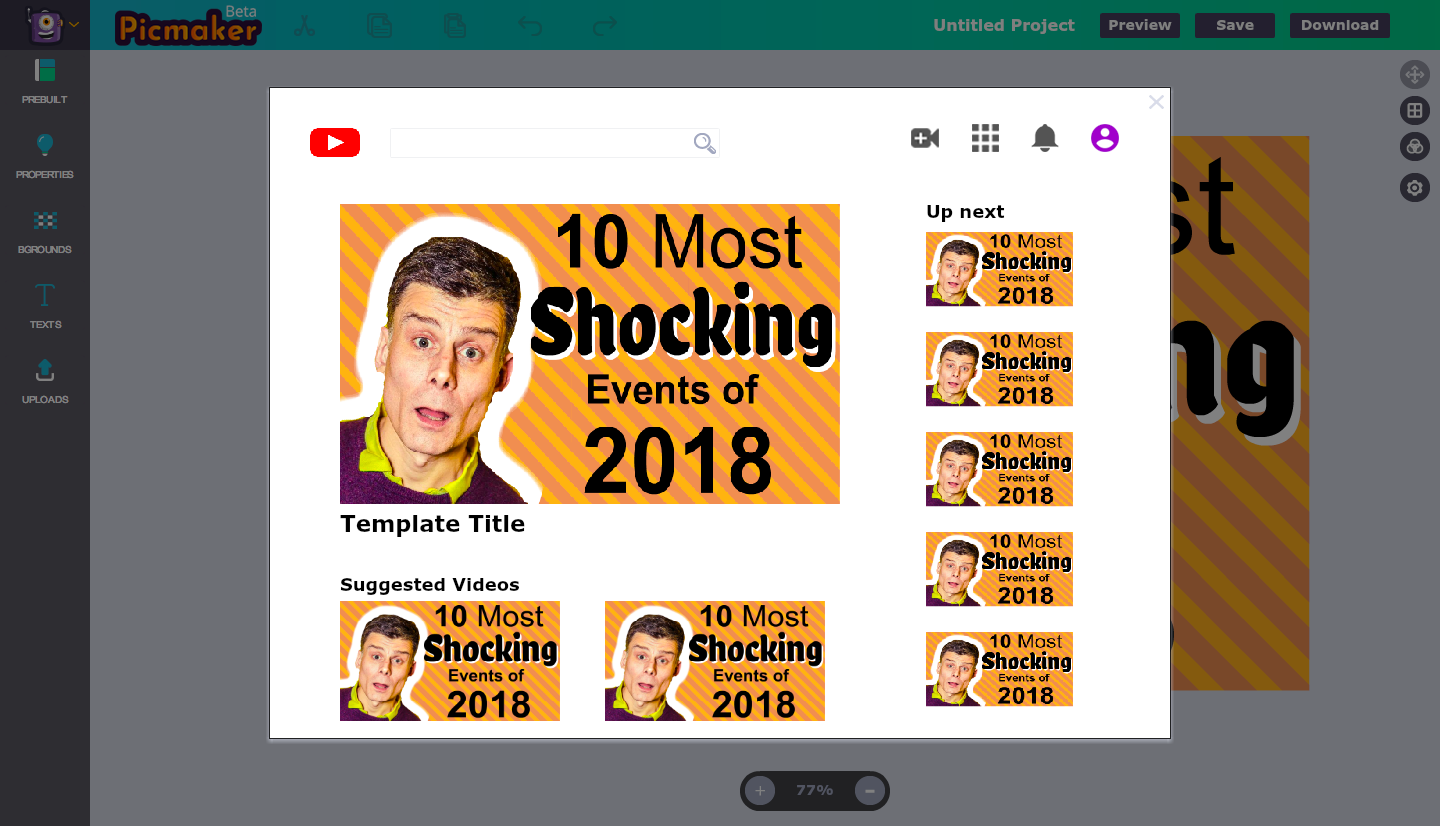
Before downloading the thumbnail and adding it to your YouTube video, it’s good to preview how the thumbnail will actually look on the YouTube layout.
This helps you make sure that the font size and style of the text used in the thumbnail is both visible and contrasting enough to get noticed.
To preview your thumbnail, click on the preview button on the top right-hand side of the screen.

Now, you can preview your thumbnail in different sizes that are available on the YouTube layout.
Once your cool thumbnail is ready, click on the Download button to download the image to your PC.
3. Enable the Custom thumbnail Option
When you create your YouTube channel the custom thumbnail option will not be active by default. To enable that option you need to first verify your YouTube account.
Follow these steps to verify your YouTube account:
1. Sign In to YouTube
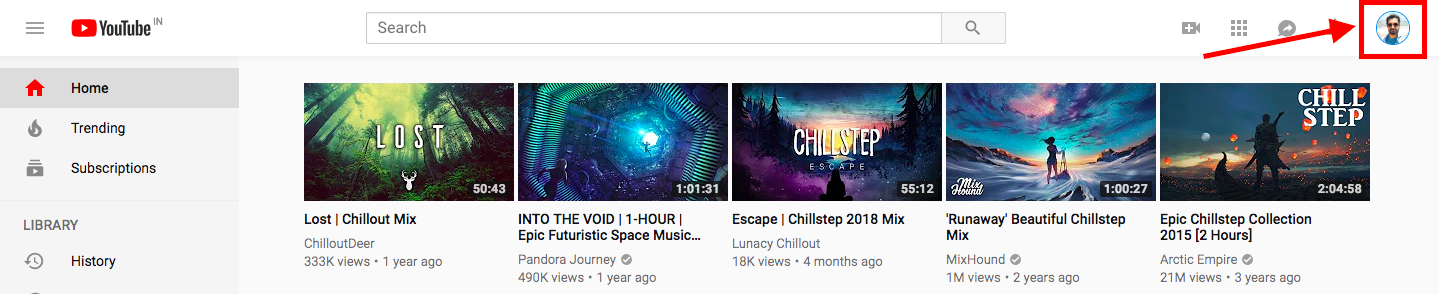
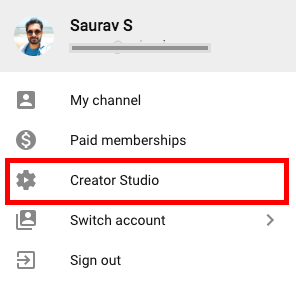
2. Click on the profile image on the top right-hand side of the page.
3. Click on Creator Studio
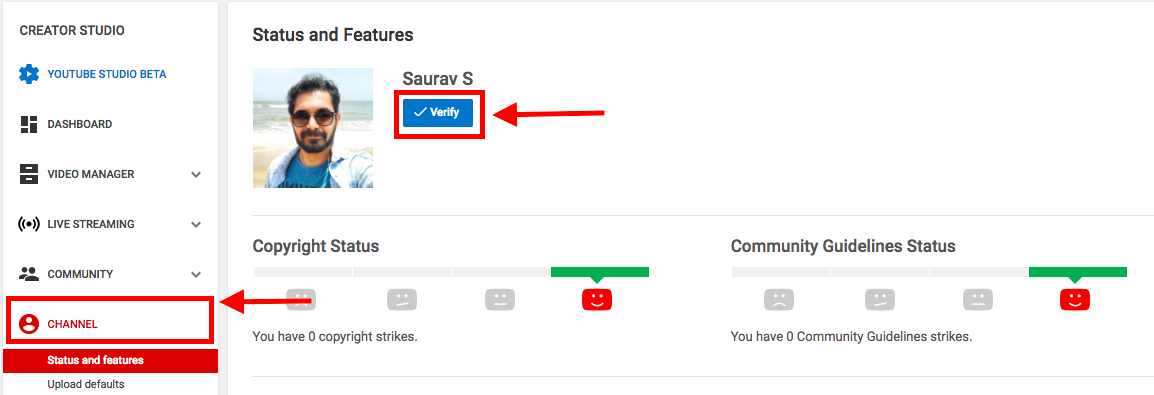
4. Then click on the channel tab in the left-hand side panel. After clicking that you will see the verify option. Click on verify.
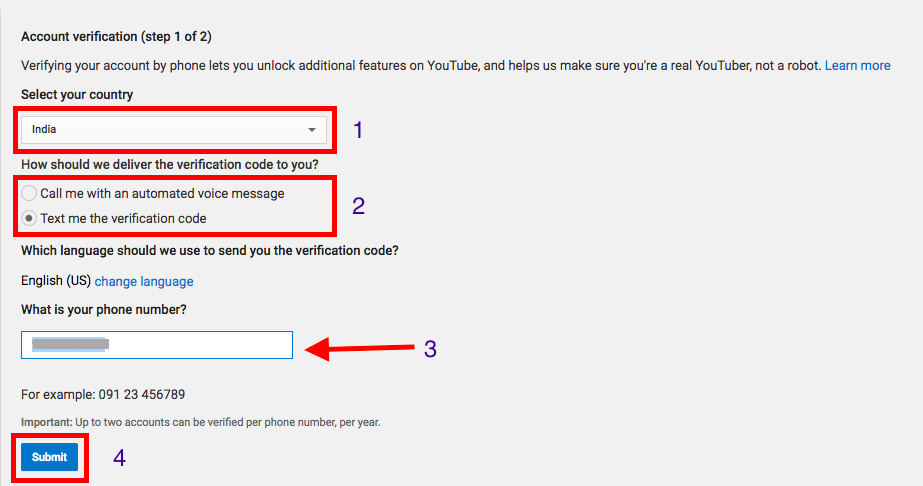
5. Select your country, select a call or text option to get the verification code and then enter your phone number and click on submit.
6. Enter your verification code in the text box and click submit.
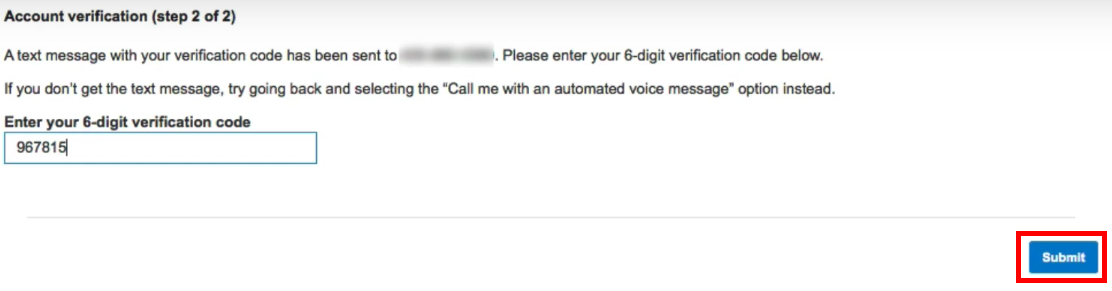
7. After verification, you will see a message that says that your account is verified

The custom thumbnail option should be enabled for you now.
4. How to add the created thumbnail to your youtube video
Now that your custom thumbnail is ready, let us see how you can add it to your video.
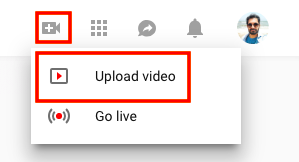
First, upload your video by clicking on the camera icon on the top right-hand side of the YouTube screen and click on upload video.
Once you upload your video, YouTube will give you three auto-generated thumbnails options to choose from. Besides that, you can also see an option for uploading a custom thumbnail.

Click on this button and upload your custom thumbnail.
And you are done! Simply publish the video to see your thumbnail in action!
It is that simple!
Along with the features mentioned above, Picmaker also has 1000+ stock photos, 1,00,000+ graphic elements and much more to make your thumbnails truly stunning!
Do you think we've missed any other tip to make the thumbnails look even cooler? Let us know in the comments below